ROCKWOOL CUBES
Hydroponic Seed Starter
What is Rock Wool
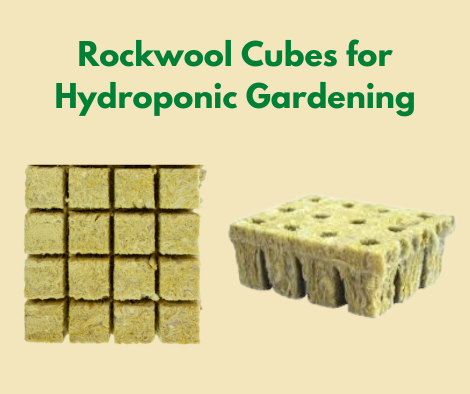
Rockwool is a lightweight hydroponic growing medium made from molten basaltic rock which has been spun into fine fibers, and then formed into growing cubes, blocks, and slabs.
Rockwool is a perfect growing material for hydroponic gardens because of its ability to hold water while also retaining more oxygen than typical soil mediums, thus encouraging more rapid, healthy growth.
Continue reading to learn more about how to grow strong, healthy hydroponic seedlings in rockwool cubes, as well as how and when to successfully transplant them into your Vertical Hydroponic Garden.
What are Seedlings
A seedling is a a very young plant that has grown from a seed.
When a seed is exposed to proper light, air, temperature and moisture, it expands, causing the seed coat to crack open. The embryo inside the seed then begins to emerge, starting the growth process.
Newly sprouted seedlings are very fragile, and require special care for several weeks in order to grow into healthy, mature plants.
Rockwool Grow Cubes
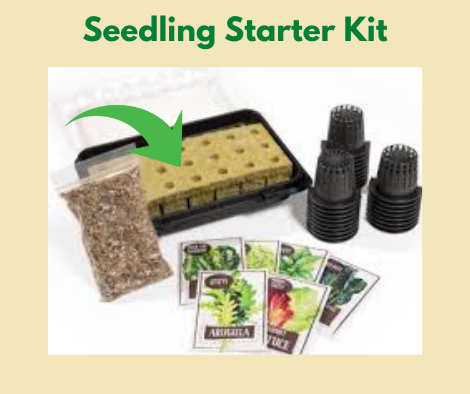
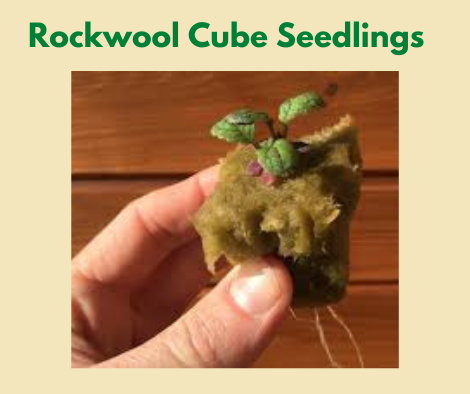
When you purchase a Juice Plus Tower Garden, rockwool grow cubes are included in the Seedling Starter Kit that comes with your new hydroponic garden (see image).
If you don't have a Tower Garden, you can purchase Rockwool Cubes and the Seedling Starter Kit separately, and place your seedlings in the location of your choice.
HEALTHY SEEDLINGS
It All Starts with a Seed
Starting seedlings seems like a simple task, doesn't it? After all, you just take a few seeds, give them some water and watch them grow... right?
Not quite.
In order to grow healthy seedlings that mature into thriving plants and offer a bounty of fresh produce, it's essential that you begin with the highest quality seeds available.
When you purchase a Tower Garden, it comes with a Seedling Starter Kit which contains a variety of high quality starter seeds. Many people, however, prefer to expand their seed selection as they become more familiar with their garden.
I recommend ordering additional seeds from SEEDSNOW online. They offer a wide variety of seeds specifically recommended for vertical hydroponic gardens such as Tower Garden. All of their seeds are 100% natural, non-GMO, non-hybrid (open-pollinated), and 100% heirloom.
SEED TERMINOLOGY
Germinating Seeds
Germination, the process of seeds growing into seedlings, is influenced by four major factors: temperature, moisture, air, and lighting.
The first and most important factor in germination is moisture, as it causes the seed to begin to expand, thus starting the germination process.
The remaining factors, especially temperature, all contribute to the health and success of the new seedling.
It is important for successful germination to use fresh, high quality non-GMO seeds.
Heirloom Meaning
An heirloom is something of value that is deemed worthy of being passed down from generation to generation.
When it comes to gardening, heirloom seeds are open-pollinated (non-hybrid) plant varieties that have been cultivated and passed down for more than 100 years.
Heirloom seeds are among the best producing, most flavorful, and most dependable varieties with unique flavor and color characteristics.
Non Hybrid Seeds
Non-hybrid seeds, also known as open-pollinated seeds, are pollinated by nature- an insect, a bird, the wind, etc. They are not cross-bred or genetically modified by humans in a laboratory.
Since they have the same DNA as their parent plant, non-hybrid seeds stay true to their variety and their original genetic qualities generation after generation.
No-hybrid seeds also provide you with a lifetime supply of healthy seeds which allows you to sustainably feed and nourish your family for years to come.
Coarse Vermiculite
Vermiculite is a naturally occurring mineral; it is lightweight, very porous, and easily absorbs water.
When starting seeds in rockwool cubes, vermiculite is placed on top of the seeds to help maintain moisture levels and insulate the seedlings against temperature and humidity changes.
Vermiculite also reflects light downward toward the seeds, which helps light-germinating seeds grow a lot easier and faster.
Best Time to Start Seedlings
Especially if you're planning on using your hydroponic garden outdoors, the timing of starting your seedlings indoors is critical to success. If you start them too early, they may be damaged by an unexpected frost; if you start them too late, they may not have enough time to fully mature before the end of the growing season.
As a general rule, it's best to plant seeds about six weeks before the last frost. If you're not sure, refer to this planting calendar for specific dates for your area.
Of course, if you're keeping your vertical hydroponic garden indoors, timing is not an issue.
SEED STARTING SUPPLIES
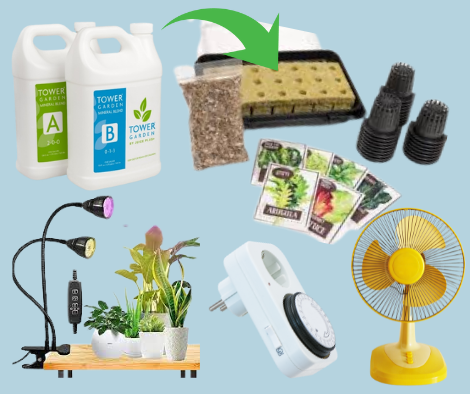
The Seedling Starter Kit included with your Tower Garden (also sold separately) contains a seedling tray, rockwool cubes, vermiculite, and a variety of seeds .
In addition , you will need some or all of the following items:
Grow Light (if the outdoor temperature is too cold to place seedlings outside)
A Small Fan (to prepare plants for the outdoors)
An Outlet Timer (optional)
Heating Mat (if needed)
Mineral Solution A and B (comes with Tower Garden; also sold separately.
Best Grow Lights for Seedlings
When it comes to grow lights, there are basically two choices: Fluorescent and LED. Be sure to look for lights designated as "full" spectrum or "broad" spectrum since they are most effective for growing seedlings. If you look at the research, you'll find that fluorescent lights are good for growing seedlings, but LED's are better.
If you already have T5 fluorescent lights (aka shop lights) at home, they should work just fine. For best results, you may want to combine a “warm” white tube with a “cool” white tube to get the full spectrum of light.
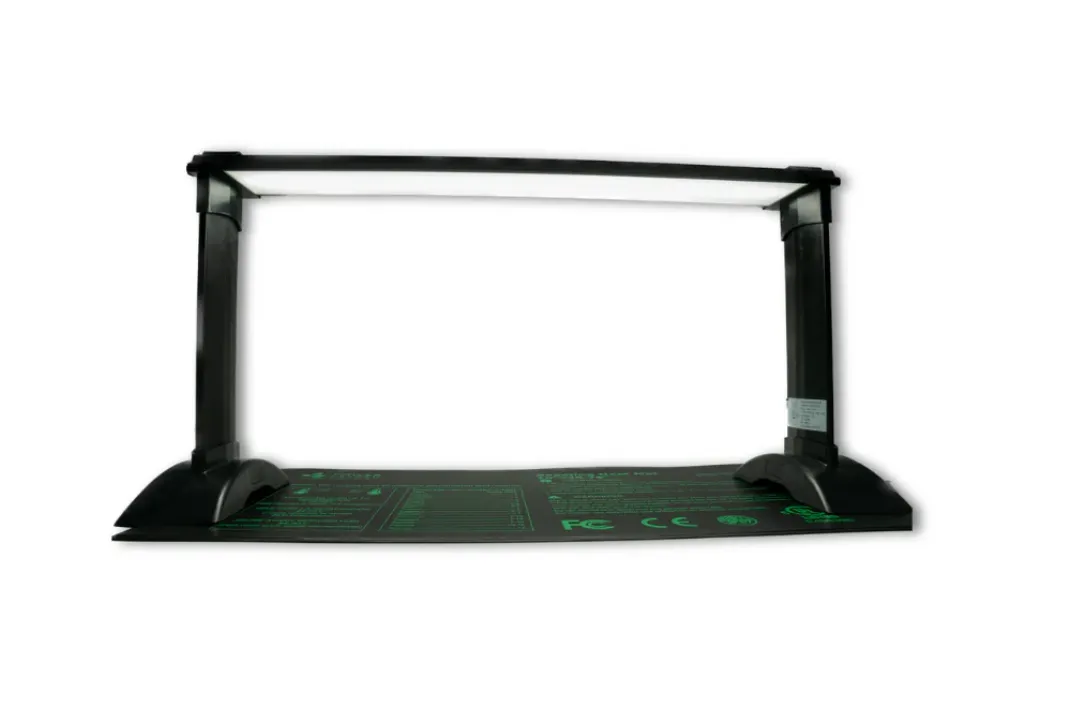
If you want to purchase grow lights and are looking for a recommendation, I prefer The Germinator by Juice Plus (see image). It includes a tabletop LED grow light with timer, as well as a heating pad, to create an ideal environment for seedlings to grow.
STARTING SEEDS IN ROCKWOOL
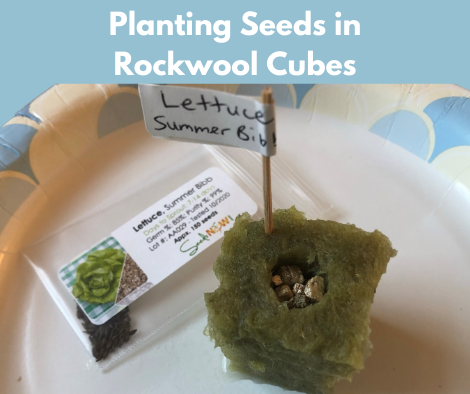
To get started, prepare your rockwool cubes by soaking them in water for 30-60 minutes prior to planting your seeds.
Next, place the appropriate number of seeds into each rockwool cube. For lettuce and greens, add 6-12 seeds to each cube. For herbs, add up to 6 seeds per cube. And for vegetables with larger seeds, add 1-2 seeds per cube.
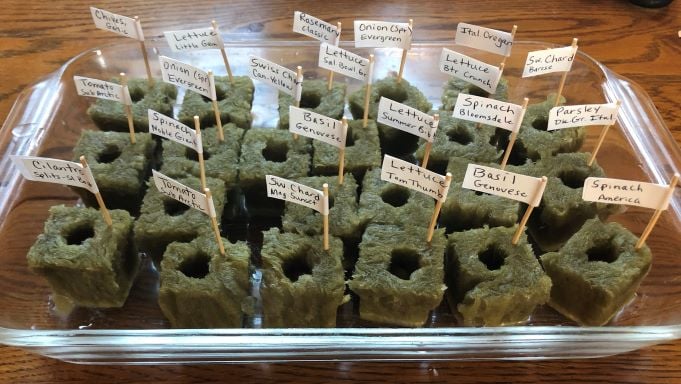
Finally, lightly fill each rockwool cube with vermiculite (for smaller seeds, like lettuces, fill only half-way) and spritz a little water on the vermiculite in each cube. Place cubes in seedling tray or a glass baking dish. Be sure to label seedlings for identification purposes, since they all look the same at this point.
KEEP YOUR SEEDS HAPPY
How Often to Water Seedlings
You can maintain a moist environment for your unsprouted seedlings by adding a 1/4 inch of water to the seedling tray each morning, or by misting your seedlings with a spray bottle whenever you notice them drying out.
The goal here is to keep your seedlings moist, but not overly wet; otherwise, they may not sprout.
Do Seeds Need Light to Germinate
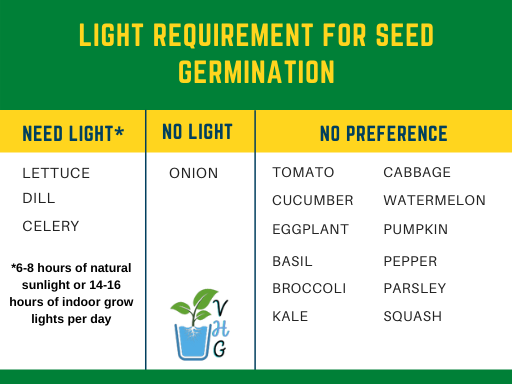
While temperature and moisture are the most critical factors in seed germination, giving your seeds 6-8 hours of natural sunlight (if it's warm enough) or using a grow light for 14-16 hours each day can improve the germination process for certain types of seeds.
For example, lettuce, dill, and celery seeds DO NEED light to germinate, whereas onions germinate more successfully in a dark environment.
Other seeds, such as tomato, cucumbers, and eggplant, do not have a preference and will germinate in either light or dark conditions (see chart for complete list).
To keep it simple, unless you're planting onions, you may want to provide light for all seeds after planting them in the rockwool cubes.
WHAT TO DO AFTER SEEDS SPROUT
As soon as the seeds start to sprout, be sure to remove them from the heating mat, if using one, to avoid the growth of fungal pathogens. If only a few of the seedlings have sprouted, remove the sprouted seedlings from the tray and put them in a separate container. Give them plenty of light (see below), and continue to keep them moist. Continue this process until all seeds have sprouted, then proceed with the following guidelines.
Light Schedule for Seedlings
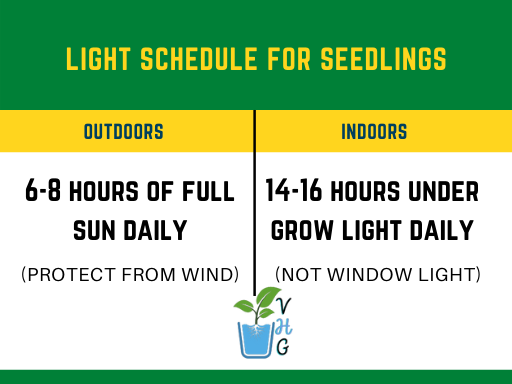
As soon as you see sprouts starting to peek out from the vermiculite, give your new seedlings plenty of light (window light will most likely not be enough at this stage).
If it's warm enough, you can place them outdoors in full sun for 6-8 hours a day (be sure to protect them from the wind). If it's too cold outside, place a grow light within inches of the seedlings indoors for 14-16 hours a day (the outlet timer comes in handy here).
In addition to light, continue to keep your rockwool cubes moist, but not oversaturated (same as before they sprouted). This can be accomplished by adding 1/4 inch of fresh water to your seedling tray each day, or by misting your new seedlings with water to keep them from drying out.
When to Fertilize Seedlings
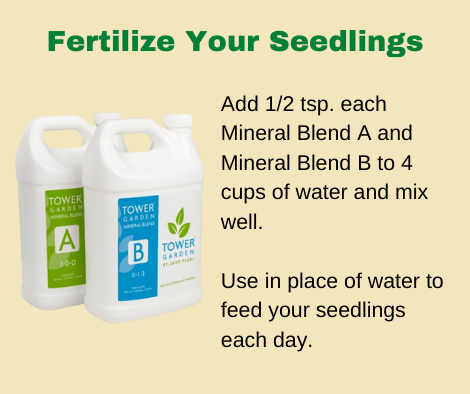
After a couple weeks, once your seedlings have true leaves (not the initial ones from inside the seed) and the seedlings are 1-2 inches tall, start adding diluted Mineral Blend A and B to the water in the tray every other day.
In a glass container, add 4 cups of water and 1/2 tsp each Mineral Blend A and Mineral Blend B and mix well. Use 1/4 cup of this solution in the seedling tray each morning in place of water, or place the mineral solution in a spray bottle and mist the seedlings with it to keep them moist.
Continue this process until your seedlings are ready to move to their permanent home. In the meantime, follow the suggestions that follow.
MAKE YOUR SEEDLINGS STRONG
How to Thin Seedlings
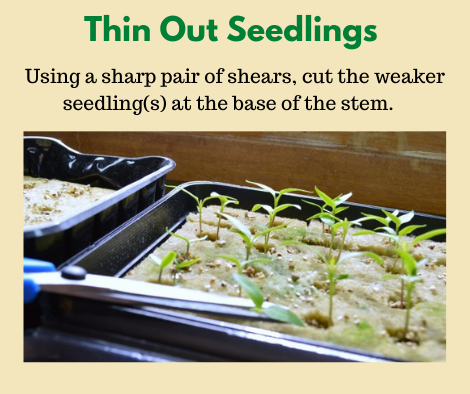
About the same time you start fertilizing your seedlings, it's also a good idea to thin them out to reduce competition for water and nutrients and improve air circulation around the plant.
This is especially important for heartier, fruiting crops such as tomatoes, peppers, and squash. Greens and herbs, on the other hand, are usually fine with multiple plants per cube.
To thin them out, use a pair of sharp shears to cut the stem of the weaker seedlings at the base, leaving only the strongest seedling to survive and thrive. Do NOT pull the seedlings out, as this can damage the roots of the remaining plant.
Harden Off Seedlings
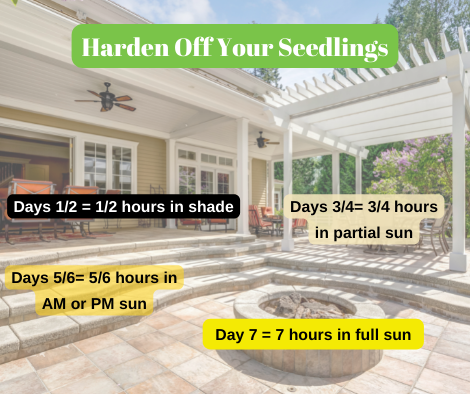
If (and only if ) you started your seedlings indoors and plan to transplant them outdoors, you will need to give them time to acclimate to their new environment before transplanting them into the garden. This adjustment process, called "hardening off," will prevent young seedlings from going into shock which could delay plant growth or even cause your seedlings to die.
Start introducing your seedlings to outdoor conditions gradually over the course of a week. For example, place seedlings in a mostly shaded location protected from the elements for one hour on Day 1 and two hours on Day 2; then expose them to morning or afternoon sun for 3 hours on Day 3, etc. Increase the sun intensity and hours of exposure each day until your seedlings are in full sun all day on Day 7.
ARE YOU READY FOR THE FUN PART???
When to Transplant Seedlings From Seed Tray
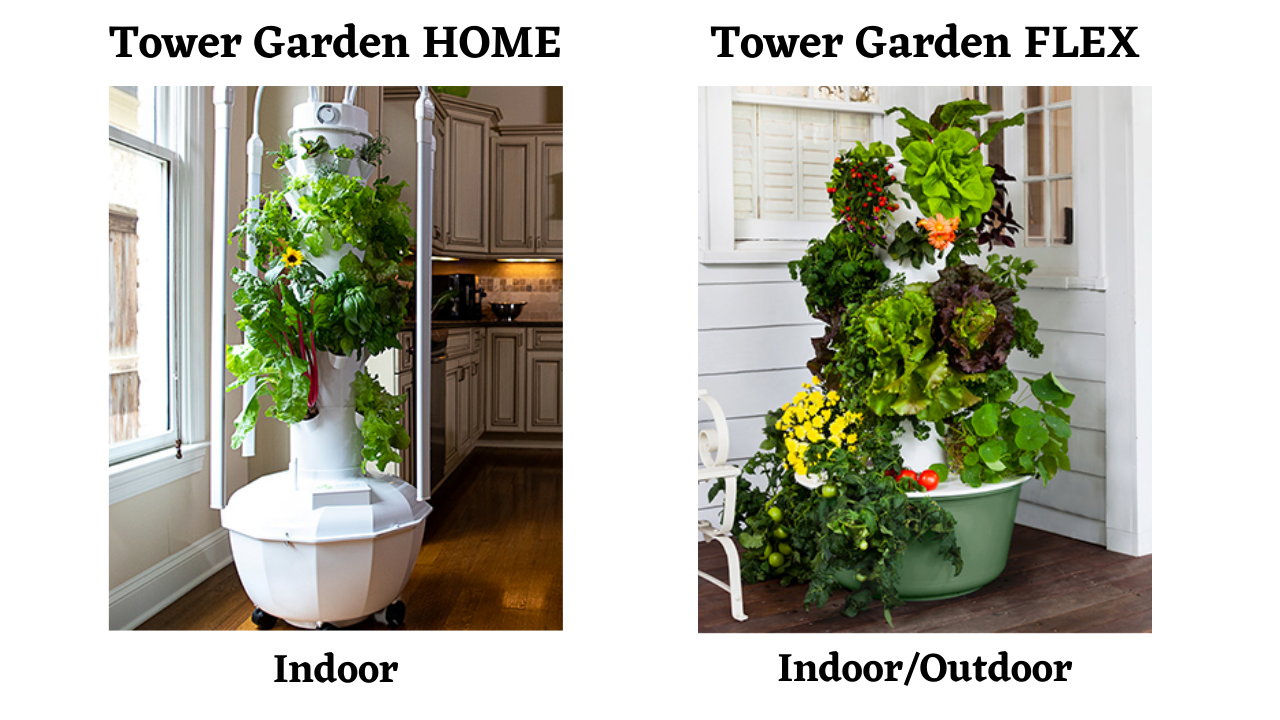
Finally, after hardening off, your seedlings are ready to be placed into your Tower Garden; get ready for a growth explosion!
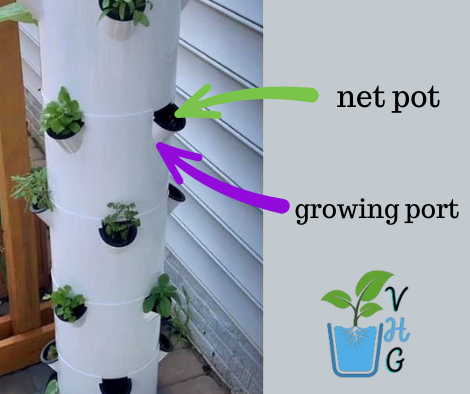
Place one rockwool cube into each growing port, making sure to press it down until it touches the bottom of the net pot (a black plastic insert that holds that seedling in place).
Special Note: For the first month or so, you'll need to reduce the recommended dose of nutrients in the Tower Garden reservoir by 50% until your plants are large enough to handle the full amount (refer to the growing guide that came with your garden).
In addition, be sure to maintain a PH level of between 5.5 and 6.5 by testing the water 1-2 times per week and adding PH + or PH - as necessary.
HAPPY GROWING!!!
Don't Wait To Start Growing Your Own Clean Food at Home!
Need Help Placing Your Order?
Whether you need additional information or just need help placing your Tower Garden order, we're here to help.
Click on the button below to schedule a complimentary one-on-one consultation.
